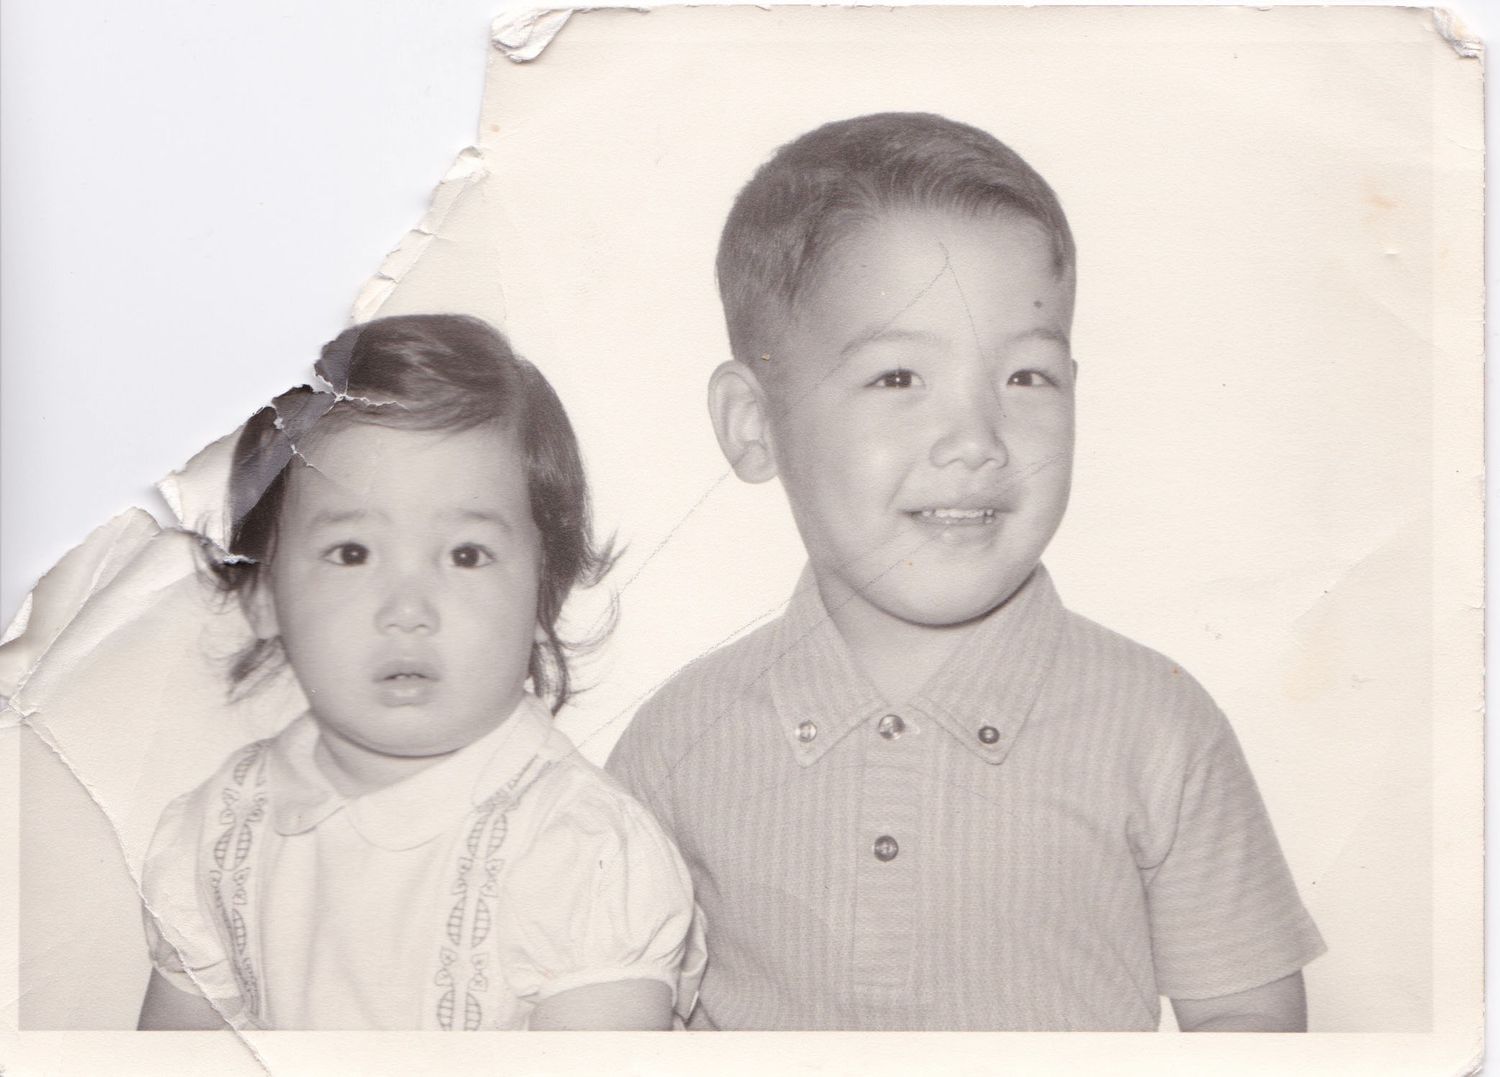
I have been working with photography and photo repair for almost ten years now. Through my previous business, Greg Landeros Photography, I not only offered photography, but I also included photo repair and restoration services. But recently I decided to put the camera down and focus solely on my photo repair business and created Landeros Photo Repair. The most common questions people have asked me have been how does the process work? Why do we charge what we do? And the most recent and questions have been about AI and how it applies to photo repair? So, I decided to write this short article to hopefully shed some light on the topic.
Regarding AI, with so many advances in technology and AI services, the process of photo restoration is affected in both a positive and negative way. More and more you see online ads claiming a one swipe fix to repair photos. The negative side to those ads is that they give a sometimes false illusion that photo repair is just a one click fix. In some cases AI does a pretty good job with that, but in many complex repair cases, what you are really getting is a replacement image that often, especially with faces, just replaces the details with lookalikes. I have tried a few AI programs and it has been my experience that at times AI might seem quick and easy and does a decent job, but then the next photo using AI is a complete train wreck. Without any skills to know what to do next, you may have just wasted your money.
With my repairs, I rely on AI tools only when needed. It is important to meticulously work through each area of the image to repair and clean up as much as possible manually to keep the image as authentic as possible. The positives to AI are that AI can be a very powerful and helpful tool for certain problem areas and could help expedite the process, but it should be used sparingly and carefully.
The repair process
So what are the steps to having photos repaired? Step one is the scanning process. If you plan to scan your photo yourself, it is always best to have an image scanned with settings that will best preserve the data. For instance, jpegs are images that might appear to look great, but due to them being a "lossy" file, data and information will be missing or compressed. Even if your original photo was already a jpeg, a new jpeg scan will further compress the image and cause more quality loss. You won't see it with the naked eye, but for repairs, it makes them even more difficult to work with. Tiff format is the preferred format for repairing photos. Tiff files are "lossless" files which means there is no loss of information. It also means it will be a large file, but saving all data can be very important if you plan to print and frame your image. Once repaired, then your TIFF will then be converted to and delivered as a jpeg. On my web page, you will see a dedicated section for scanning tips.
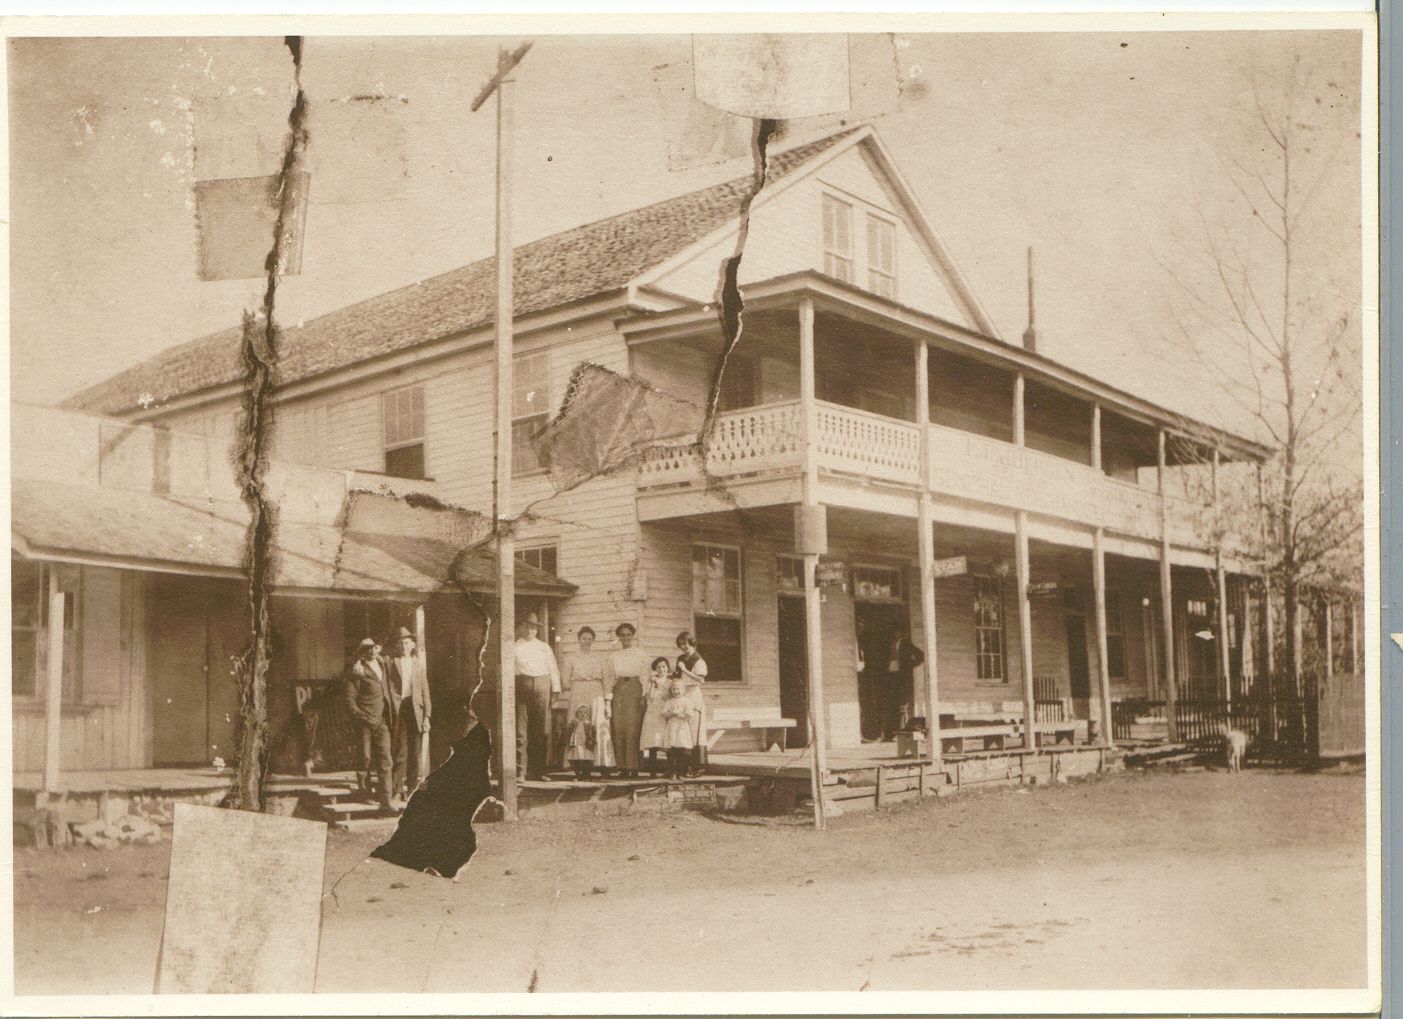
If you look at the photo above, you might think there is no hope. Though the image is intimidating from a repair point of view, I always assess the image closely, then come up with a plan of attack. Quadrant by quadrant is my approach, fix the easier issues and then worry about the major damage.
For all repairs, I rely on a few editing programs, but I mainly use Adobe Photoshop. There are unlimited tools and techniques available with this very powerful program. Photoshop is an amazing and very complex program and though I have been working with it for ten years, I feel like I have barely scratched the surface with what that program offers.
My approach to photo repair is always to repair the photo section by section creating multiple layers and utilizing various tools and strategies for each problem. At a distance, the photo above already looks bad, but blown up on a large monitor and zoomed in, you really see just how bad. I have had many clients tell me, " the photo barely needs work", but once it is enlarged, I show them all of the specs, scratches, fingerprints, etc. Most people just do not see it.
The image below is just a section of the above photo but zoomed in. Just in that section alone, you can see the countless challenges. Sometimes there is so much damage, it becomes necessary to guess what was there before and figure out how to recreate it.
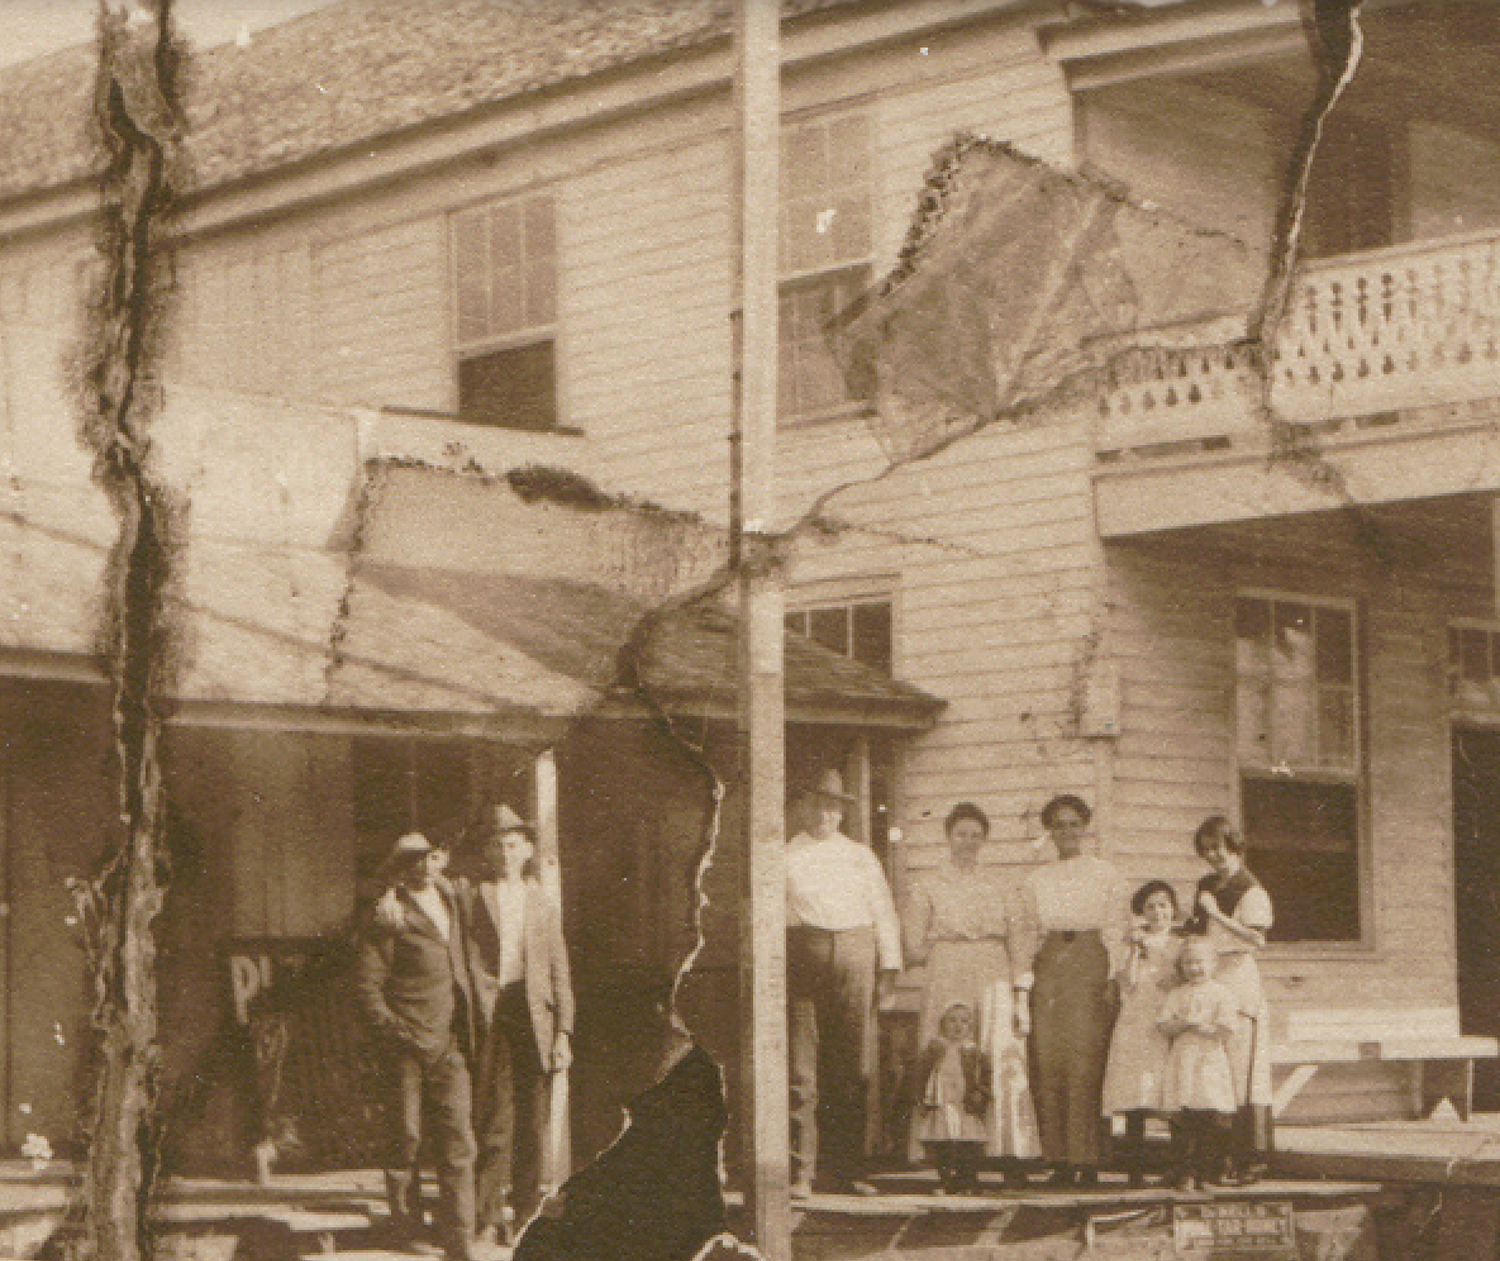
This photo was a long meticulous process which involved working slowly and carefully, removing damages, re-aligning, cleaning dirty areas, re-creating the lost data, sharpening, dodging and burning, etc. If you were to rely on a one click AI program, it would likely just create something close but definitely different. It would likely delete some details that were important, add items that were never there and make faces that are not close.
A photo repair expert needs to be able to work around problem areas, know how to work with several layers, understand how to composite images, know how to remove stains, add, textures, replace sections, remove fade, restore original color, and colorize black and white images or re-color old photos and more. Any experienced photo repair artist has likely spent countless hours and a decent amount of money to learn their craft. Those are the talents you are paying for.
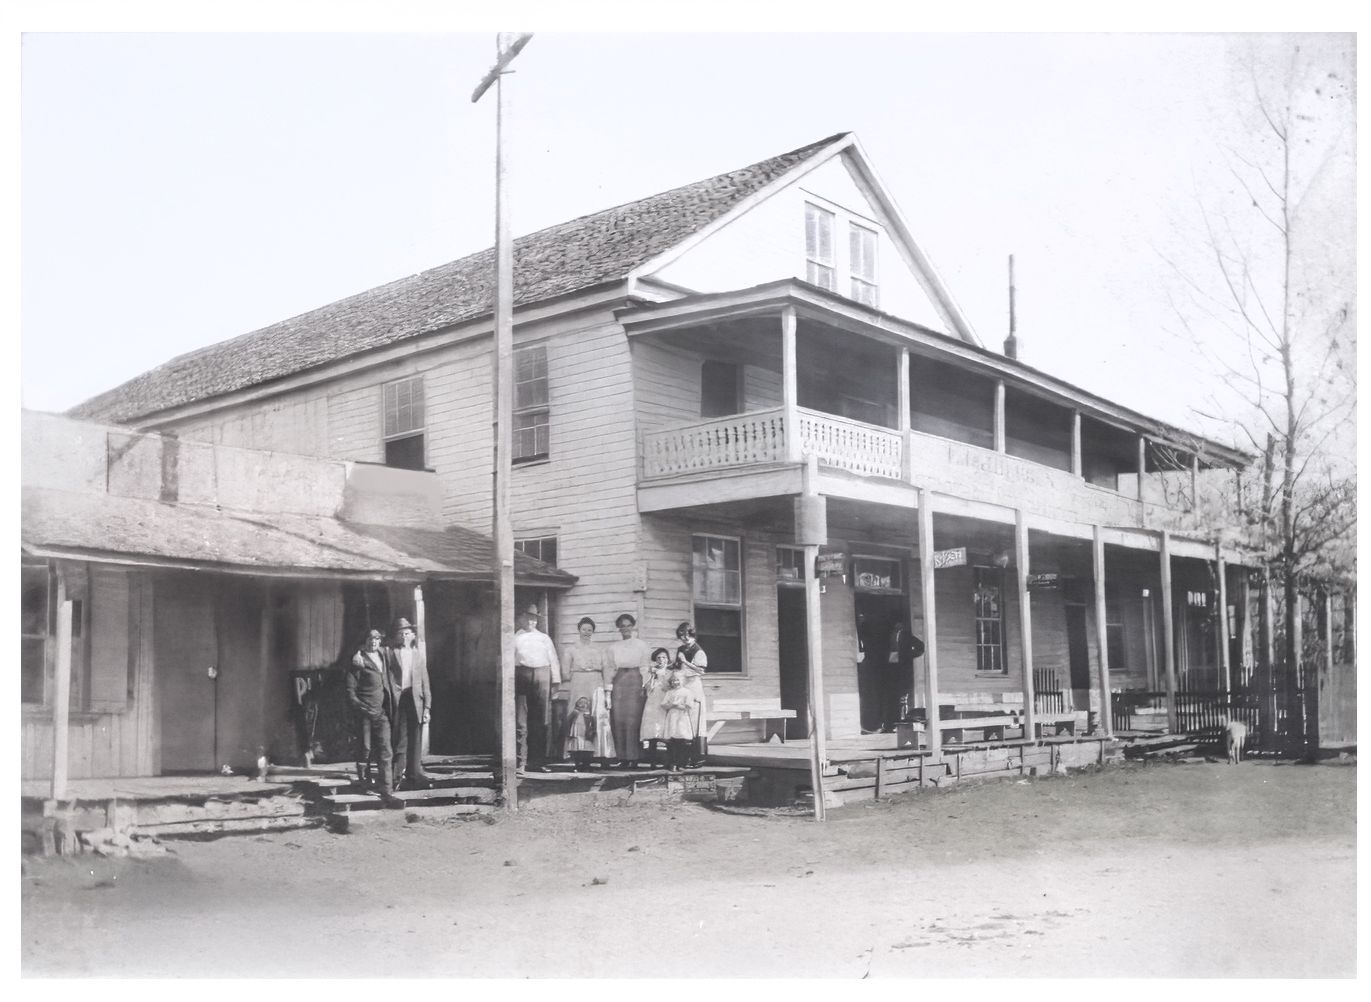
Below you can see the final repair of the above image. Your memories and family images are important, so it is important to hire someone who has passion and will take the time needed with each image.
If you want a free assessment of your image, visit picrepairs.com for your next repair.